"I'm a Professional House Painter — I Know How to Stop Annoying Splatter When Decorating Your Home"
Make a statement, not a mess. This house painting pro offers advice on how to paint your walls without all the splatter


The Livingetc newsletters are your inside source for what’s shaping interiors now - and what’s next. Discover trend forecasts, smart style ideas, and curated shopping inspiration that brings design to life. Subscribe today and stay ahead of the curve.
You are now subscribed
Your newsletter sign-up was successful
Whip out your paintbrush and overalls, and prepare to transform your room with a lick of paint.
Even for those of us who feel confident in our ability when it comes to how to paint a room, the possibility for drips and splatters can often hold you back from embarking on the task.
We asked our expert for all of his tips and tricks to ensure the smoothest paint application possible, leaving messy splatters on the walls of the past.
1. Pick the right paint

While there is no way to completely avoid the risk of splatter, there are some rules to follow if you want to make your painting experience as smooth as possible, according to our expert.
'You can minimize splattering by using a higher quality paint or a paint that is specific for ceilings,' explains Barry Krall, brand expert of Groovy Hues. 'Most high-quality paints are thick and viscous so the liquid mass drips less.'
Selecting a thicker paint, whether from your favorite hardware store or the best online paint brands, will ensure a smoother process with minimum dripping and splattering, while cheaper paints will tend to be looser, leading to those unwanted drips and bumps.
2. Don't skip the prep

It's important to spend some time making sure your space is ready for painting before getting stuck in, you're wanting to execute your paint ideas for walls – not all over your floors!
The Livingetc newsletters are your inside source for what’s shaping interiors now - and what’s next. Discover trend forecasts, smart style ideas, and curated shopping inspiration that brings design to life. Subscribe today and stay ahead of the curve.
'The best way to avoid drips is to lay out plastic and drop cloths (like these from Amazon) over the areas you want to protect,' says Barry Krall, 'tape and trim work to prevent paint drips drying on top of the trim.'
This includes any furniture, as well as your flooring. 'To protect flooring from paint splatter, lay down drop cloths or plastic sheeting before starting the painting process. Secure the coverings with tape to ensure they stay in place and provide complete coverage,' Barry explains.
3. The trick is in the tools

Even with the best quality paint, for the smoothest application you'll need to get the tools to match.
If you want to work with a brush, Barry Krall says: 'A good quality brush will hold paint better than a cheap throw away brush (plus you can clean and re-use it).'
But if you are opting for a roller, here are some tips you may want to know before you buy.
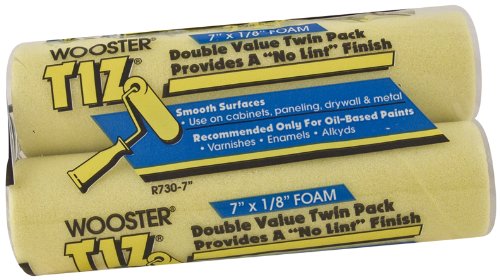
'Rollers have different thicknesses,' explains Barry. 'Thin rolling covers (like these from Amazon) between 1/8 - 1/2 inch hold less paint and do not go as far when rolling, but they splatter less than rollers that are 1/2+ in cover thickness.'
More than just thickness, the material of the roller will also impact its effectiveness. 'There are different materials that make roller covers and brush filaments. They range from synthetic, natural, and a mixture of both,' Barry continues.
'Most paint stores like a Sherwin-Williams or a Benjamin Moore could guide a customer on the best applicator to use with their paint for the best results. The grids in roller buckets are good for removing excess paint that does not soak into the roller cover.'
4. Learn the right technique

Now that you've got your materials covered, it's time to focus on the techniques that will make a difference. There are certain shortcuts for how to paint a room fast you'll want to avoid if you want a clean finish.
'Avoid over loading the applicator, move with even pressure, move at a steady pace (not rushing or moving too slow), start every application with a first stroke releasing most of the paint the applicator in a controlled motion, and go back over that first stroke and evenly apply it to the area,' advises expert, Barry Krall.
'When brushing, I pack the brush (dip the brush into my paint bucket and shake or scrape off the excess). I then take the brush and cut in the wall,' says Barry. The term 'cut in' refers to the act of outlining the wall so you are able to paint up to the edges without touching the ceiling or any fixtures.
'Starting the cut line you push and spread the brush about a inch away from where you want to cut in. The first stroke you are releasing a majority of the paint onto the wall from there to go back over that paint guiding it into the hard to reach places and tight corners.'
By beginning around an inch away from the cut line, you avoid the risk of applying excessive amounts of paint to the area in which you are attempting to be the most careful.
'When rolling I always start with packing my roller, dipping it in paint and rolling it over the grid to get rid of the excess.' says Barry. 'Then my first application stroke I create an "N" on a small section of the wall, then keeping contact with the wall I go back over the N from top to bottom of the wall to the cut line, spreading the paint evenly over that small section.'
'Normally, a 9 inch roller will be able to spread 8-10 feet up and about 2 feet across when spreading a fully packed roller cover,' Barry explains.
For those harder-to-reach areas, Barry recommends using a large rolling pole: 'When painting high walls and stair wells, you can use large rolling poles like these from Amazon. Rolling poles can get as large 20 feet in length.'
'The hard part is cutting in the ceiling. Using a ladder, you reach up to the high points to cut in the ceiling. I suggest using a pivit tool (like this from Amazon) which is a wedge to level out the legs of a ladder, a ladder that has self leveling legs, scaffolding, and my preferred method - hire a professional!'
5. In case of emergency
If you follow all these steps, and still end up with a drip or two, do not fear.
'When it comes to paint splatter, a damp rag will clean up a non-porous surface as long as the paint is still wet,' explains Barry Krall.
The clean-up process will change depending on the nature of the paint spilled: 'Oil based may require a solvent. Dried on paint on a non-porous surface can be cleaned up with a putty knife. Porous surfaces where the paint is already dried in may require some sort of solvent to pull up the paint.'
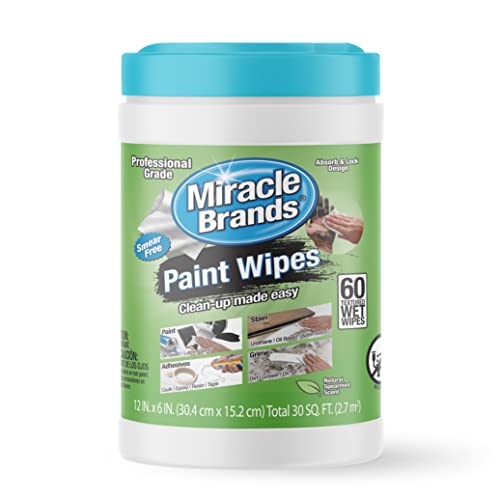
For dried paint spills that you are trying to soften before completely removing, Barry recommends Miracle Wipes (which you can also find on Amazon).
However, some situations call for more intensive clean-up processes. 'Porous surfaces where the paint is already dried in may require some sort of solvent to pull up the paint,' says Barry. 'Paint on concrete can be especially irksome. Again, as long as it is still wet you can heavily dilute it with water which will allow easier clean up. If the paint is dry on porous concrete, you can scrape off most of the paint, but you may have lingering paint you just can't reach. You can use chemical cleaners or solvents to clean this up, and/or call a professional (like us) to come clean up with our line of cleaners.'

Maya Glantz is a Design Writer at Livingetc, covering all things bathrooms and kitchens. Her background in Art History informed her love of the aesthetic world, and she believes in the importance of finding beauty in the everyday. She recently graduated from City University with a Masters Degree in Magazine Journalism, during which she gained experience writing for various publications, including the Evening Standard. A lover of mid-century style, she can be found endlessly adding to her dream home Pinterest board.

